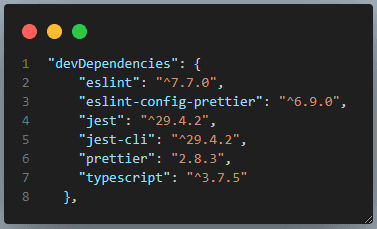
Dev dependencies are packages required only for the development phase and not for the application to run in production. Some common examples of such packages are testing frameworks (jest, cypress, karma, mocha), code linters (prettier, eslint), build tools (babel, webpack), and more.
The short answer
To install one or more npm packages as dev dependencies, you can use the npm install command combined with the --save-dev flag as follows:
$ npm install <package_name …> --save-dev
For example:
$ npm install jest eslint --save-dev
Alternatively, you can use the shorthand -D flag (short for development):
$ npm install <package_name> -D
All the npm packages you add using the above flags will be found under the devDependencies section in package.json and automatically installed in the node_modules folder of your project.

Easily retrieve this command using Warp’s AI Command Search
If you’re using Warp as your terminal, you can easily retrieve this command using the Warp AI Command Search feature:

Entering npm install dev dependencies in the AI Command Search will prompt an npm command that can then quickly be inserted into your shell by doing CMD+ENTER.
Installing a specific package version
By default, the npm install command installs the latest version of the specified packages. If you want to install a specific version instead, you can use @ followed by the package's version number.
For example:
$ npm install jest@^27.0.0 --save-dev
Installing dev dependencies using the package.json
Suppose you want to add multiple packages with specific versions, then adding the package names and versions in the package.json file would be easier than manually installing each package using the npm install <package_name> command.
"devDependencies": {
  "eslint": "^7.7.0",
  "eslint-config-prettier": "^6.9.0",
  "jest": "^29.4.2"
}
Once the package.json file is updated, you can run the npm install command to automatically install all the packages listed under the dependencies and devDependencies sections in the node_modules folder.
$ npm install
Installing dev dependencies only
To install only the dev dependencies, you can use the npm install command followed by the --only=dev flag:
$ npm install --only=dev
Troubleshooting common dev dependency installation issues
If you cannot install the devDependencies, cross-check the value of the NODE_ENV environment variable (commonly used in the Node.js environment). If this value is set to production, then npm will skip the installations of packages listed under the devDependencies. Thus, ensure that the value for NODE_ENV is set to development.
To verify the value of the NODE_ENV variable, you can use the echo command as follows:
$ echo $NODE_ENV
To set or update the value of the NODE_ENV variable, you can use the export command as follows:
$ export NODE_ENV=development
Alternatively, you can use the following syntax, to locally set the NODE_ENV variable as development everytime you execute the npm install command, ensuring that both production and development dependencies are installed.
$ NODE_ENV=development npm install
Reinstalling dev dependencies
Reinstalling or updating or all npm packages follows the same process and commands for both dependencies and devDependencies. Read more about how to reinstall all packages with npm.
To update or re-install only the dev dependencies, you must use the --save-dev flag. This command will update the already installed dev dependencies according to the version ranges defined in the package.json file.
$ npm install --save-dev
To update a specific package to the latest version regardless of the version specified in the package.json file, use the npm install command followed by the package name:
$ npm install <package_name> --save-dev
Alternatively, you can use the npm update command as well:
$ npm update --save-dev
$ npm update <package_name> --save-dev
Troubleshooting cache issues when updating already installed packages
NPM maintains a cache of downloaded packages to speed up the installations. If you encounter any installation issues, consider clearing the npm cache by using the npm cache command:
$ npm cache clean --force
Written by

Mansi Manhas
Filed Under
Related Articles
Removing npm Packages
Learn how to remove packages locally, globally, and from the registry using the npm uninstall command.

Execute Packages With npx And npm
Discover the power of npm's npx tool, a developer's best friend for running packages without global installs.

Clear npm Cache
Learn how to clear the npm cache on Linux, macOS, and Windows.

How To Update NPM
Learn how to update npm to a specific version using the npm, nvm, or npx commands.

Re-Installing Npm
Learn how to reinstall Node.js and npm on macOS, Linux, and Windows using `curl`, `brew`, `apt`, `nvm`, and Node installer.

How To Reinstall Packages With Npm
Brief guide to reinstalling npm packages using npm

Check Npm Package Version
Check an npm package version within your project

Install NPM Packages From GitHub
Check an npm package version within your project

List Installed Npm Packages
Learn how to list globally and locally installed packages with npm, including their dependencies.

