When developers switch to Warp for the first time, the first “a ha!” moment often happens when they discover they can use a mouse and cursor on the command line—just like how they would edit text in an IDE.
Following that same thread of inspiration, we’ve been exploring new ways to bring text-specific utilities into the terminal where they’re useful.
In this post we’ll shine a light on two “why didn’t we think of that before?” features for text that make it easier to read documentation, run commands, and search through output.
Open and execute markdown files in Warp
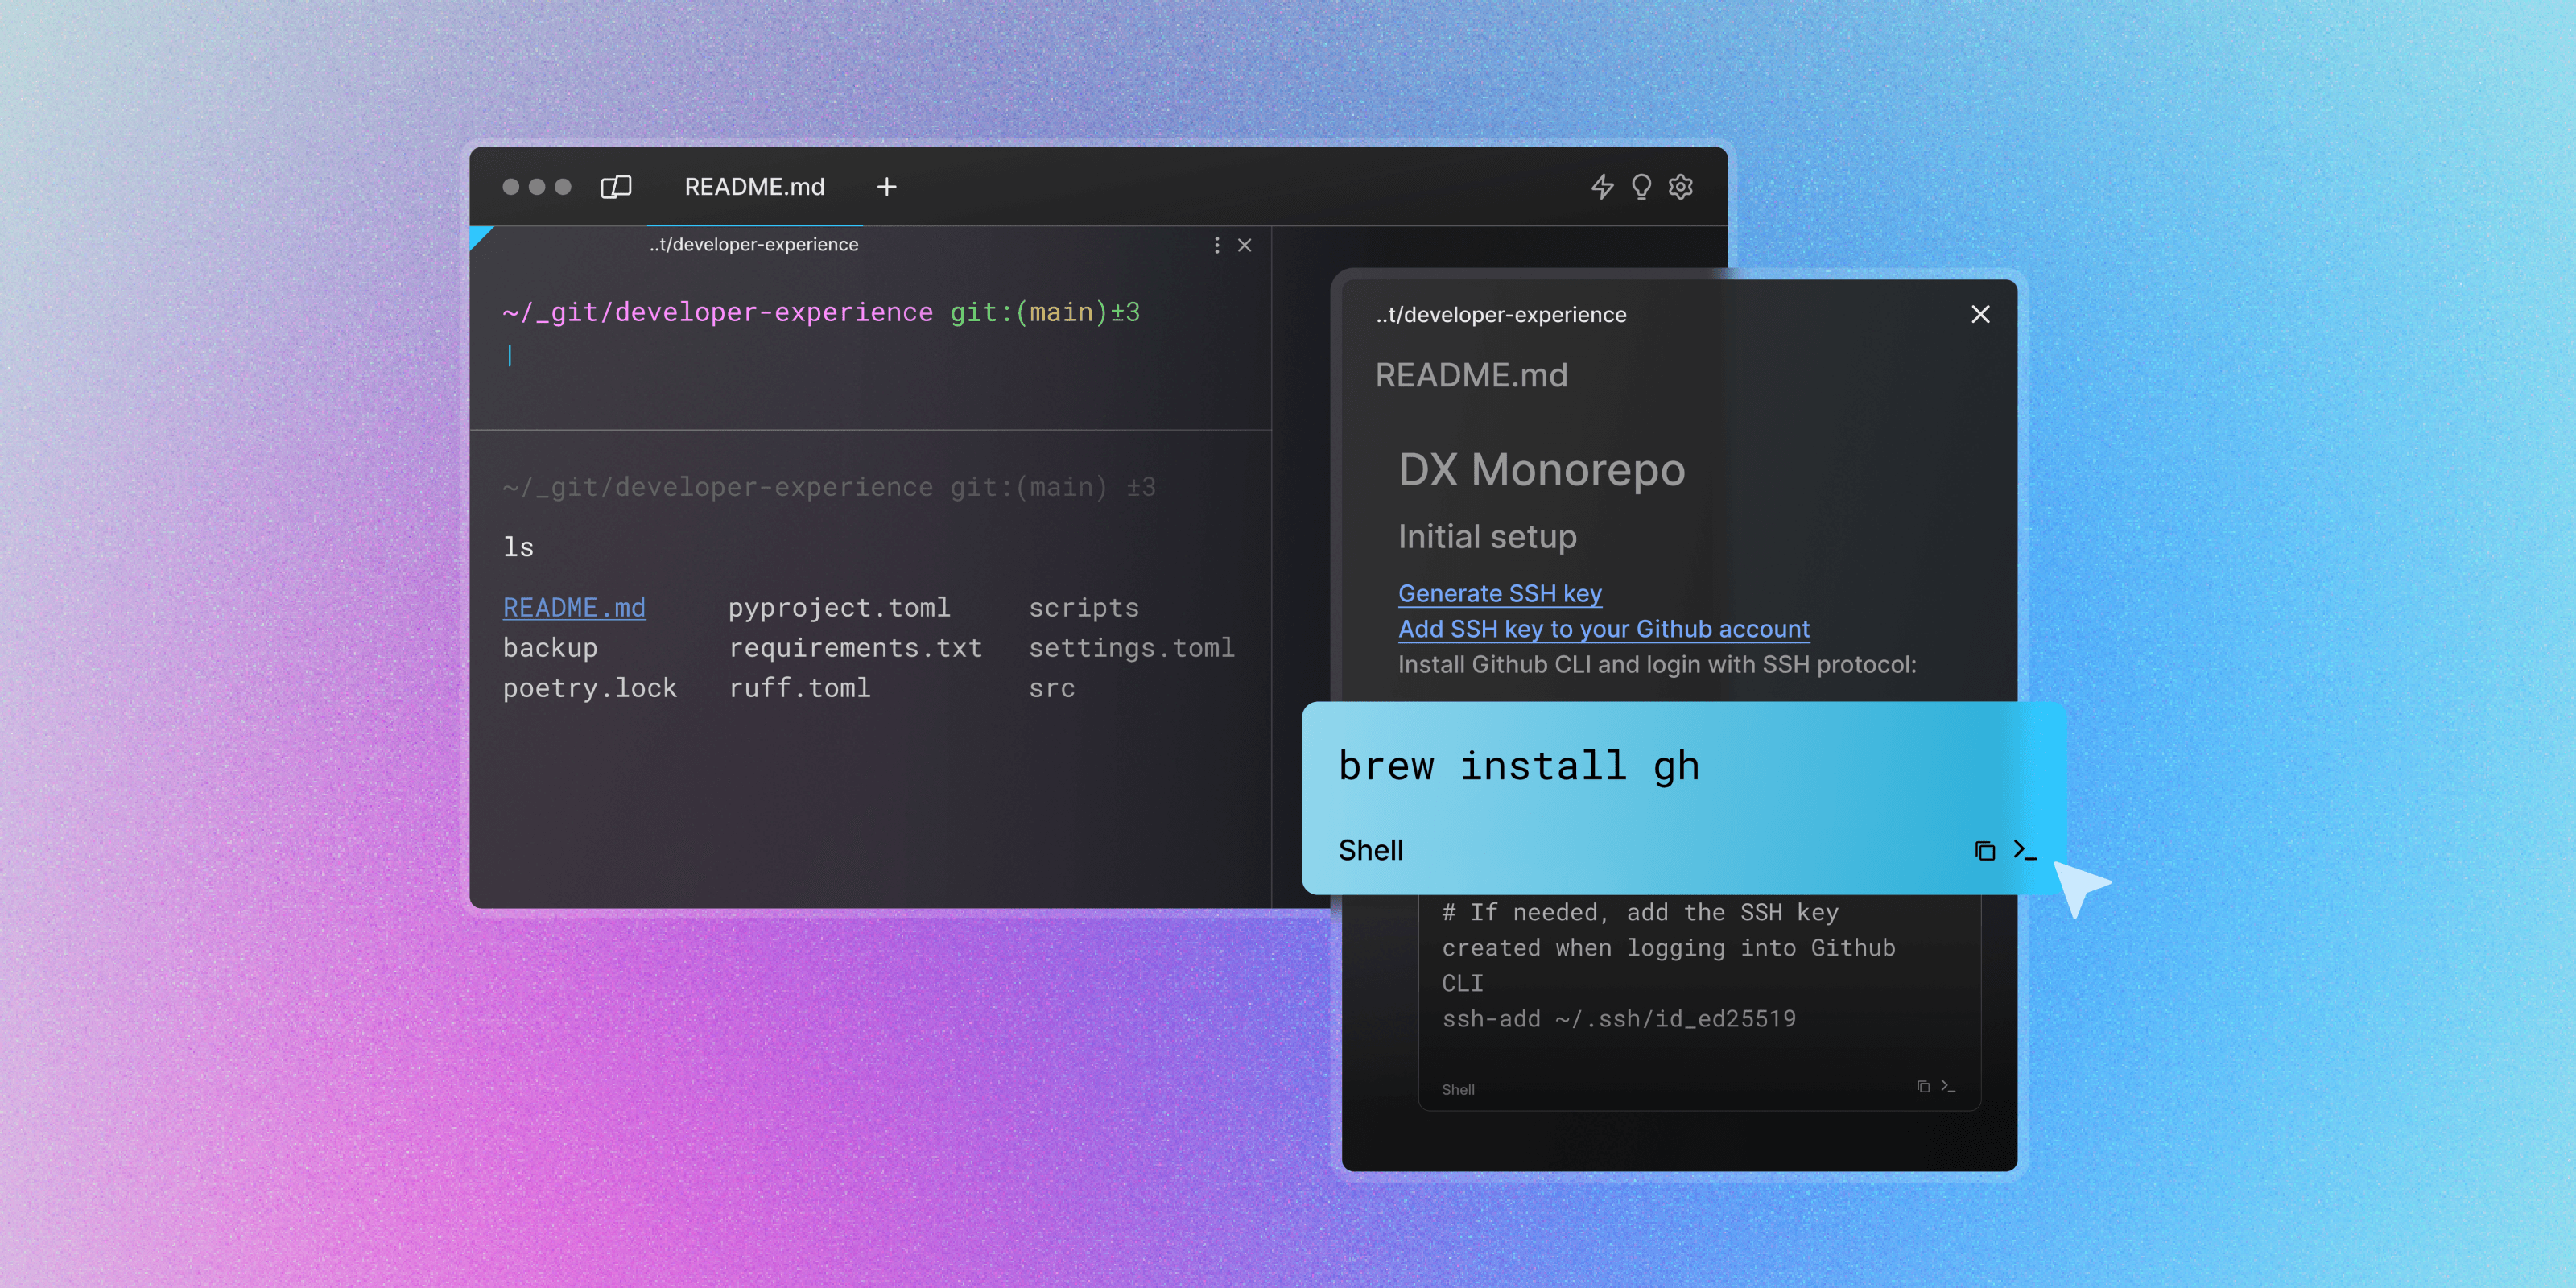
Now you can open markdown files (like your README.md files) in Warp and click to easily run any command from markdown content.
Open any .md file in Warp and click to run commands.
With Warp’s new Markdown Viewer, your markdown documents can live in panes alongside your command line. This means you no longer have to download a separate tool to open relevant documentation like READMEs, runbooks, or guidance for integrating testing.
Warp will also recognize any code for shell commands in your markdown files and render those commands as interactive code blocks. You can click (or CMD - Enter) to execute the commands, more like how you might run a cell in a Jupyter notebook.
Spoiler alert: The layout engine that displays markdown files in Warp will also power the rendering of Notebooks in Warp Drive, a feature that’s in development now. This means if you start adopting the markdown format for building local documentation and runbooks today, you’ll be able to gracefully port those over to Warp Drive in the future once Notebooks become generally available.
Quickly search through logs with block-based filtering
New Block Filtering in Warp lets you bring lines that match a search string into focus without using CMD - F or grep. This is especially useful for parsing through logs, even as a process is still running.
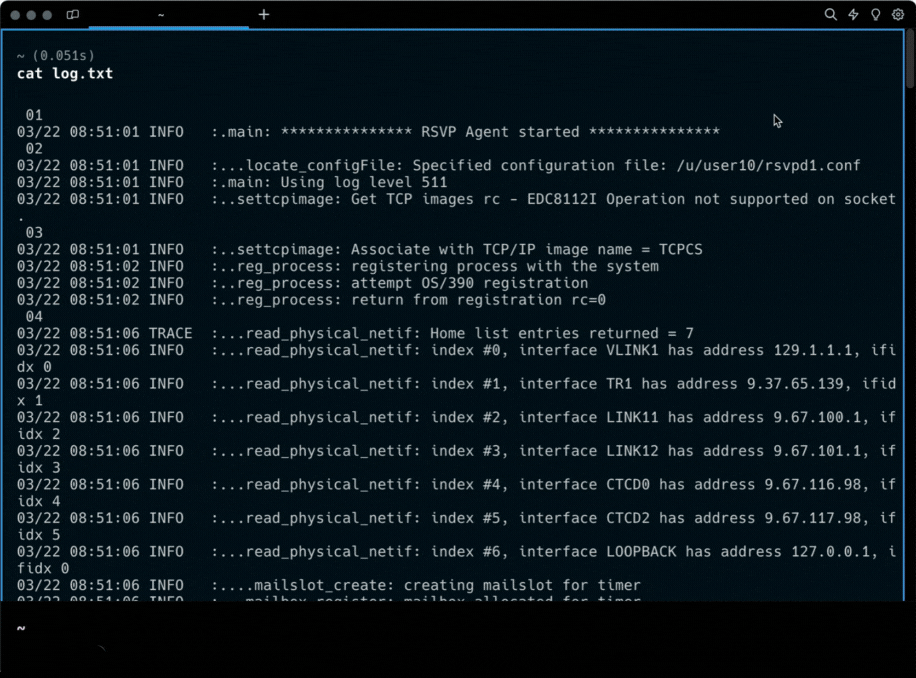
Filter block output by string to find matching lines.
Block filtering vs. grep
The utility grep lets you search through files for matches, but it has some limitations when it comes to parsing through log lines in the terminal output.
In order to run grep for some logs, you either have to pipe the output in when you run the command or save the output to a file.
If you remember to pipe your output into grep, you lose all of the context for non-matching lines which may have been useful to reference. Adjusting the filtering is cumbersome, and if you need to run the command again, you might not get exactly the same output you would have a moment before.
For this reason, it’s a common behavior to run commands, copy the output, save it to a file, and then run grep against the file. But, this workflow is pretty clunky. And, if the command continues to print additional output, you may end up copying and saving content a few times to search through the logs.
Beyond that, grep isn’t the most intuitive tool for searching through text. There are lots of flags and options you can use to be precise about your search, but they’re difficult to remember without referencing the manual. If you don’t get the results you want, you have to write a new grep command and run it again.
Block filtering makes this workflow of parsing through logs easier and faster with a simple UI that’s more like the search functionality you’d expect in a modern IDE or code editor. When you enter a string to filter, Warp immediately shows lines with matching results and you can adjust the filter as many times as you’d like. You can toggle on options to search by regex or enforce case sensitive matching. All of this happens directly on top of the output in the terminal.

Adjust block filters to toggle between regex or case sensitive matching rules.
Try it for yourself
If you’re not already using Warp as your daily driver, download the latest version and give these new features a try today!